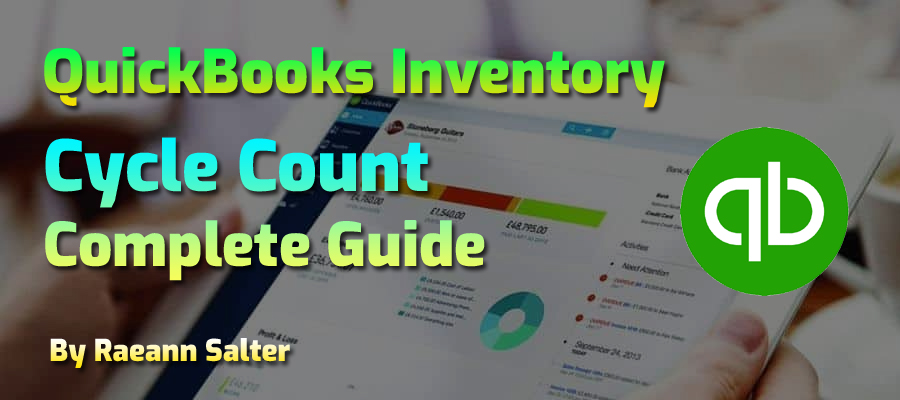
How to Use Cycle Counts to Manage QuickBooks Enterprise Inventory?
Cycle counting is an essential inventory management technique in QuickBooks Enterprise that helps businesses maintain accurate stock levels without full physical inventory counts. This method enhances efficiency, reduces discrepancies, and ensures seamless inventory tracking. Whether conducting cycle counts manually or using a mobile device, QuickBooks Enterprise provides tools to streamline the process, improving overall inventory control and business operations.
This guide can serve as a tutorial for existing users of QuickBooks Enterprise who want to improve their cycle counting process, or as a demonstration for those considering an upgrade to the Platinum version or new users looking to purchase a subscription.
What is Cycle Count in Advanced Inventory - QuickBooks?
Cycle counting is a method of inventory management that involves counting a small portion of your inventory on a regular, ongoing basis, rather than conducting a full physical inventory count all at once. Instead of shutting down operations to count everything at once, cycle counting allows you to count different items at different times, ensuring that your inventory records remain accurate throughout the year.
In QuickBooks Enterprise, the cycle count feature is integrated into the Advanced Inventory module, enabling businesses to manage and maintain accurate inventory levels without the disruption of a full-scale inventory count.
QuickBooks Inventory Cycle Count Complete Guide
In this blog, we will explore how to manage inventory effectively using cycle counts in QuickBooks Enterprise. We’ve broken down the process into six key chapters, each covering a crucial step of the cycle count procedure. From activation and setup to conducting counts manually or via mobile, each chapter will guide you through the process to ensure smooth inventory management. Let’s dive into how you can implement and master cycle counting in QuickBooks Enterprise.
Chapter 1: Activate Cycle Count
In this guide, we’ll walk you through the process of setting up and using cycle counts in QuickBooks Enterprise. Follow along to learn how to streamline your inventory management with cycle counting.
Activate Advanced Inventory
Before we can start using Cycle count, we need to ensure that this feature is active in your QuickBooks Enterprise account.
Open QuickBooks Enterprise:
Launch QuickBooks Enterprise and log in to your company file if you haven’t done so already.
Access Advanced Inventory Settings:
Go to the Edit menu and select Preferences.
In the Preferences window, click on Items & Inventory on the left-hand side, then navigate to the Company Preferences
Click on the Advanced Inventory Settings button to make sure you have the Platinum Edition. If that box is greyed out email me at raeann.salter@mindingmybooks.com for help with upgrading.
If you see the same screen as what mine is showing, we are ready to get started.
Chapter 2: Cycle Count Setup
Step 1: Creating Warehouse Users
The first step is to create your warehouse users. You can assign users to receive Purchase Orders, Pick and Pack Sales Orders, and perform cycle counts from a mobile device. The warehouse user can be both an employee and warehouse user. You do not need to add them to your user count in QuickBooks Enterprise. Let’s go through the steps to set up a user.
Choose Vendors at the top of the toolbar, click Vendor Center.
From the New Vendor drop-down list, select New Vendor.
In the Vendor Name field, you can enter the name of the user or create a generic name such as mobile device 1, mobile device 2, and so on.
Select the Additional Info
From the Vendor Type drop-down list, select Warehouse User.
Click OK once finished.
The names of all the users will show up on your mobile device once connected to the company file.
Step 2: Connect Mobile Device
Next, let’s connect your mobile devices to QuickBooks Enterprise. This allows your warehouse team to use mobile scanners or tablets for receiving, picking, packing, and performing cycle counts directly from the warehouse floor.
I am going to demonstrate how to connect with my Android device. Keep in mind that Apple devices do not have an app to sync to QuickBooks Enterprise. Currently, Zebra TC21 and TC26 mobile scanners are supported. Discontinued devices by the manufacturer but still supported are Zebra TC20, TC25, TC51, and MC40. I got a guy in case you need to purchase mobile devices.
First, click on your Google Play If not already signed in, sign in with the same Google account that you use for Google Play on your Android device.
Next, search for QuickBooks Desktop App. Download and install the app.
Within the app choose Warehouse, Manage pick, pack, & cycle count and choose Get Started.
Go back to the Site Operations tab in QuickBooks. Click Add.
Enter the 6 digit number into your QuickBooks Desktop App.
Within QuickBooks Desktop confirm your device is trying to link to your QuickBooks company file. Click Yes.
Within your app you should see a success screen. Click Next.
Select your name or the devices name from a list of options.
Chapter 3: Steps to assign a Cycle Count
Step 1: Access the Cycle Count Feature
Next, we need to access the cycle count feature:
Go to the Inventory menu at the top of the screen.
Select Cycle Count from the dropdown menu.
You may need to login to your Intuit account before proceeding to the cycle count dashboard.
Step 2. Create a New Cycle Count
Now that we're in the Cycle Count window, let's create a new cycle count:
Click on the Create New Cycle Count blue button.
A dialog box will appear where you can set up the details of your cycle count.
Step 3. Set up Cycle Count Details
Here’s how we set up the details:
The Creation Date will show today’s date and cannot be changed.
Next, assign the warehouse location. If your business uses multiple locations or warehouses, select the one for which you're conducting the cycle count.
The Count Id is automatically assigned with the inventory location and count number.
In the assign to field choose who is assigned the count.
Select Find & Select Items and a popup will appear to choose your Items for Counting
You have several options here:
Select All: If you want to count everything in your inventory.
Select Quantity on Hand is less than zero to count negative inventory.
Filter items by categories if you have them set up within QuickBooks.
Find specific items: You use this filter to select specific items based on criteria like item name, description, or custom field.
Choose Add Selected Items once finished.
Your items will appear on create new cycle count screen.
You cannot sort on the columns at this time.
You can delete items either individually or select all to delete everything.
You can even Hold the Control or Shift key and click to select your items to delete.
You can add notes to show on the mobile device.
Some things to know about cycle counts.
If a single item is in more than one bin location, a separate line (task) will show for each bin location for that item.
Each cycle count is limited to 5000 tasks, so if the total items exceed 5000, delete items until you are at or below the limit.
Upon creating, cycle counts get split automatically into groups of 200 line items, so if you select a 400 item+bin combination line items, you will see 2 cycle counts created.
Once ready choose Send to Device or Create & Export to Excel. A popup will show that the cycle count was created successfully.
Click OK to take you back to the cycle count dashboard.
You will see that we created a count for the Atlanta Warehouse
Chapter 4: The Steps to Conduct The Cycle Count from Your Mobile Device
*I will be using my Android Phone for this demonstration
Step 1. Open the warehouse app
Once the cycle count is set up, it’s time to do the actual counting
Your mobile device app should be loaded on your phone.
Find and tap on your QuickBooks Desktop
Tap Warehouse to see your list of tasks.
Step 2. Prepare your cycle count
Next, prepare your app for the cycle count
The Select Task screen should appear next unless you need to login.
Within the Cycle Count section, you will see the counts assigned to you and any unassigned counts as well.
Tap Cycle Count to view the details of your assigned counts.
You can filter by site.
Each count assigned will show the Count ID, number of items in the count, and any notes if added.
Step 3. Run your cycle count
Now you’re ready to enter your inventory count.
Begin by tapping on the card to perform the count.
This will give you a list of the items to be counted.
Each item displays the item name, description, and bin location.
I wish it would let you sort by bin location.
Scan or tap on each item to enter the count. You can manually add the count or if you have scanning capabilities, you can scan the items.
I believe you can scan each item one at a time or scan one item and enter the total quantity amount manually.
You can add any notes to each of the items you’re counting.
Click Count to accept the item count. This takes you back to the count screen to choose your next item to count.
Tap update if you’d like to save your count progress. This will sync back to QuickBooks while keeping your count active to finish at another time.
Tap Finish once the cycle count is completed. Confirm you want to mark the count as completed.
Choose Back to Tasks to repeat the process until all your assigned counts are completed.
Chapter 5: How to conduct The Cycle Count Manually
If you don’t use a mobile device, you can conduct the cycle count manually.
Step 1. Export your list to excel
From the Cycle Count dashboard, checkmark the items to be counted.
Choose batch actions, select Export to Excel.
Check Excel to see if your report exported.
Step 2. Prepare the Spreadsheet
The next step is to prepare the spreadsheet for your warehouse counters.
You can sort your columns, that makes it easier for the counters. For example, you may want to sort lines by bin location.
I would hide the Quantity on Hand and Difference column so the counter can’t see what QuickBooks shows.
Print the report or save the spreadsheet and send it to a tablet or other electronic device for them to enter the quantity and notes right within the spreadsheet.
Step 3. Count the Inventory
Now you’re ready to count the inventory quantity.
The warehouse person can locate the item and bin for each line, counting and entering the totals on the form. Any notes can be added per line. If entered on paper it will need to be transferred to the excel sheet.
Again, to save time, I would suggest this part of the task be performed using a tablet or other electronic device that has Excel.
Step 4. Import to Excel
Once the count is finished it needs to be imported or manually entered on the dashboard.
Go to the dashboard and select Import from Excel.
A pop-up asking you to confirm you understand that cycle counts with a “closed” status will not import in.
Choose your saved worksheet.
You will then get a notification that the cycle count was imported successfully.
If your warehouse counters enter the information on a printed spreadsheet, it would save time to manually enter the counts on the dashboard and select Save.
If there are no discrepancies, the status of your cycle count will change to Complete.
If there are discrepancies, the status of your cycle count will change to Pending Review.
Chapter 6: Next, Review and Finalize Cycle Counting
Let’s go back to the Cycle Count dashboard within QuickBooks Enterprise.
Step 1. Access the Cycle Count Feature
First, we need to access the cycle count dashboard:
Go to the Inventory menu at the top of the screen.
Select Cycle Count from the dropdown menu.
Step 2. Filter and Sort Cycle Counts Dashboard
Next, I’ll show you how to filter and sort cycle counts within the QuickBooks dashboard.
You can filter your counts by Count ID, Item Name, Description, or Bin Location.
You can filter by a specific location if you use multiple sites.
You can filter count status of open which means a cycle count is currently in process. Pending review is automatically assigned when the quantity counted and the QuickBooks inventory count don’t match. Complete status is automatically assigned when the quantity counted and the QuickBooks inventory count match. Closed means no additional work needed.
You can then sort by date created, date updated, item name, or quantity difference. Then you can choose ascending or descending order as well.
Step 3. Review the counts
It’s time to review our counts.
I suggest filtering the status to show only pending review. You can choose My personal preference is to sort by difference in descending order. You will find what works for you.
Next, review the items with quantity differences and make any changes if needed.
Step 4. Resolve discrepancies
QuickBooks can automatically adjust your inventory account and values for you for any count discrepancies.
Checkmark the inventory items that need the quantity adjusted.
Select Batch Actions, then Adjust Quantity/Value on Hand.
You’ll receive a pop-up screen explaining how to close the cycle count along with how the quantity difference is calculated, select OK.
An adjustment window will open with all identified discrepancies.
Choose Quantity and Total Value if you need to change the value amount as well.
Change the adjustment date if needed.
Choose the adjustment account where the changes to inventory will be entered.
Enter any other information as needed.
Click on each row to see the effect of each adjustment.
In the bottom left of the screen you can view the quantity on hand, average cost per item and total value for the warehouse and all sites after the adjustment is saved.
Once finished reviewing each line, Select Save & Close.
After accepting any adjustments, you’ll be returned to the dashboard. Keep in mind the adjustment doesn’t automatically update your dashboard.
Step 5. Finalize the count
You can manually close the cycle count once your adjustments are complete and there are no more changes to be made.
On the dashboard select the cycle count lines to close.
Go to Batch Actions, then select Mark as Closed.
A pop-up will appear wanting you to confirm that you want to close the selected cycle counts and once you accept it cannot be undone.
The status now shows as closed.
One last thing, cycle counts will disappear from the dashboard 30 days after the last update.
Conclusion
That wraps up our guide on cycle counts in QuickBooks Enterprise. Implementing cycle counts helps maintain accurate inventory without the need for full physical counts. Regularly conducting them allows you to spot and fix discrepancies, ensuring your inventory data stays accurate and reliable.
Watch the video below about Using Cycle Counts to Manage QuickBooks Enterprise Inventory. For more, you can watch our video channel on YouTube.
Raeann Salter is a QuickBooks Advanced ProAdvisor and QuickBooks Consultant with a strong focus on helping business owners grow their companies through expert education, hands-on training, and innovative technology solutions. She specializes in offering customized QuickBooks setups and integrations that streamline financial data and enhance business efficiency.
Raeann Salter has over 20 Years of business experience. Her expertise spans various industries, particularly retail, manufacturing, wholesale, and franchises, where she helps clients increase profitability and make data-driven decisions.
Recommended for you
QuickBooks 2025 Features: What's New in the Latest Update?
April 16, 2025
QuickBooks Enterprise Cash Flow Hub: To Maximize Intercompany Transaction Efficiency
April 11, 2025
How to Import Sales Orders into QuickBooks Enterprise: 5 Easy Steps
March 30, 2025
How to Use QuickBooks Lot Numbers for Advanced Inventory Tracking
March 16, 2025
QuickBooks Desktop 2022 Support Ending: What Businesses Should Do Next
February 27, 2025
QuickBooks Online To Desktop Migration Guide
February 20, 2025
How to Conduct Inventory Cycle Counts in QuickBooks Enterprise Using Excel
February 11, 2025
Advanced Reporting in QuickBooks Enterprise Multi-Location Inventory
January 28, 2025
Bin Location Tracking: Receive and Release Items in QuickBooks Enterprise
January 23, 2025
Mastering Inventory Reorder Points and Transaction Forms in Multi-Location Inventory